Home > PC Assembly > Install Optical Drive
How to Install Optical Drive in PC Case
5 Steps to Upgrading/Installing an Internal CD, DVD, or Blu-Ray Reader/Writer
Optical drives can refer to either CD, DVD, or Blu-ray drives and burners. They're not 100% necessary in a modern computer these days, as not everyone has a need to play or burn physical media since almost everything is digitally available.
But if you do have an optical drive to install in your PC, you'll be done in no time as they are one of the easiest, quickest PC components to install. All that's involved is mounting the drive into a spare 5.25 inch drive bay in the front of your case, securing it with screws, attaching a SATA data cable to the motherboard, and lastly connecting a SATA power cable to your power supply.
See Also: Best Optical Drives for PC Builds
To install or upgrade to an optical drive, you'll need the following:
- SATA Optical Drive: IDE is the old connection format for optical drives, but has been completely replaced by SATA. Modern motherboards no longer support IDE, so in the rare chance you're installing an old optical drive in a newer PC, you'll need an IDE to SATA adapter.
- Computer Case With 5.25" Drive Bay: Due to falling demand for physical media, not all modern cases come with a 5.25" drive bay, so make sure your particular case does have one before buying an optical drive.
- Phillips-head Screwdriver (Size 2): See the best PC building tools guide for more.
- 1 SATA Data Cable: These come with some optical drives, but not OEM ones (just the bare drive). If you have an OEM optical drive, good news is most motherboards come with at least 2 SATA data cables.
- 1 SATA power cable: All modern power supplies come with SATA power cables.
If you have all that, let's dive into the full steps to install an optical drive in your PC case and connect it to your motherboard and power supply.
See Also: How to Build a PC (Full Guide)
1. Locate Spare 5.25" Drive Bay and Remove Cover
Some cases will have multiple 5.25" drive bays, so first decide which one you want to use to install your optical drive.
The drive bays in a case have covers on them to protect your PC from dust, so before installing a optical drive you need to remove the cover on the drive bay you want to use.
In most cases the cover can simply be removed by pushing it out with your fingers from either the inside or outside of the case, but some cases have the covers screwed into place (in which case you'll need to unscrew them first in order to remove them).
Leave the covers in place for any of your unused drive bays.
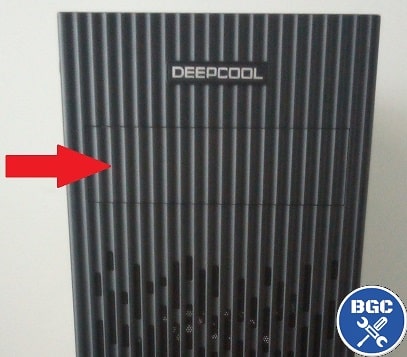 Remove the drive bay cover
2. Mount Optical Drive Into 5.25" Drive Bay
Depending on your case, you may have to remove the front panel of the case to be able to slide the optical drive into place. For our DeepCool Matrexx 30 case used in this guide, we don't need to remove the cover, but if your optical drive won't fit through the front of your case with the front panel attached, go ahead and remove it.
If you need more help with pulling off the front panel, refer to How to Install Extra Case Fans in a PC as we explain it in more detail there. Also, if you haven't already removed the side panels of the case, remove those you'll need to reach inside the computer to screw in the optical drive (from both sides).
* Safety Reminder *
If you're upgrading an existing PC with an optical drive, before opening up your case don't forget to turn off your PC, turn off the switch on the back of the computer, and remove the power plug from the wall to be safe.
To physically install the optical drive in the case you will need to slot it in from the front of the case (ie from the outside). With your PC upright or lying on its side (whichever is easiest for you), carefully and slowly slide the optical drive into the drive bay. Keep in mind some cases will instead have drive rails that you first need to attach to the optical drive with screws before you slide the optical drive into place.
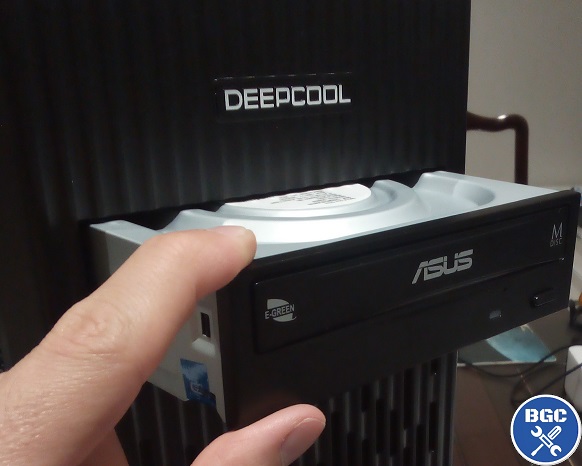 Carefully push the optical drive into place from the outside
You want to slide the optical drive all the way in until the front of the drive sits flush with the case (in other words, sits at the same level). However, keep in mind that depending on your case and the specific optical drive you're installing, the front bezel/faceplate of the optical drive might stick out a little as is the case (pun intended) with our DeepCool Matrexx 30 Mini Tower and Asus DVD-RW:
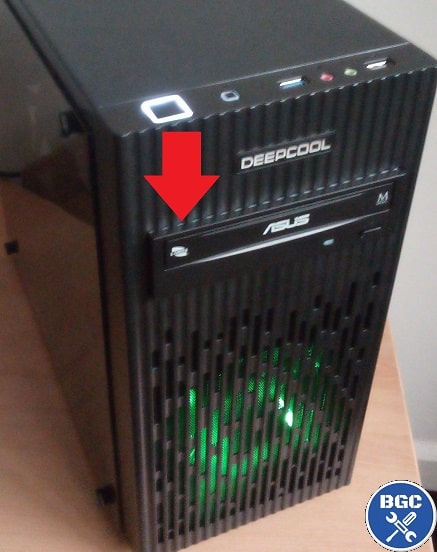 If you look closely, the front bezel/faceplate sticks out ever so slightly - don't worry as this is normal with some drives and cases
3. Line Up Holes and Screw Optical Drive in Place
Match up the holes on the side of the drive with the holes on the case's drive bay. Then screw the optical drive into place using M3 screws provided by either your optical drive (if it came with any) or your case (check your case manual to know which ones are M3; same ones used for installing SATA hard drives). You should use 4 screws to fully secure the optical drive in place, however in some cases you won't be able to reach the holes on the rear side and so 2 screws will have to suffice.
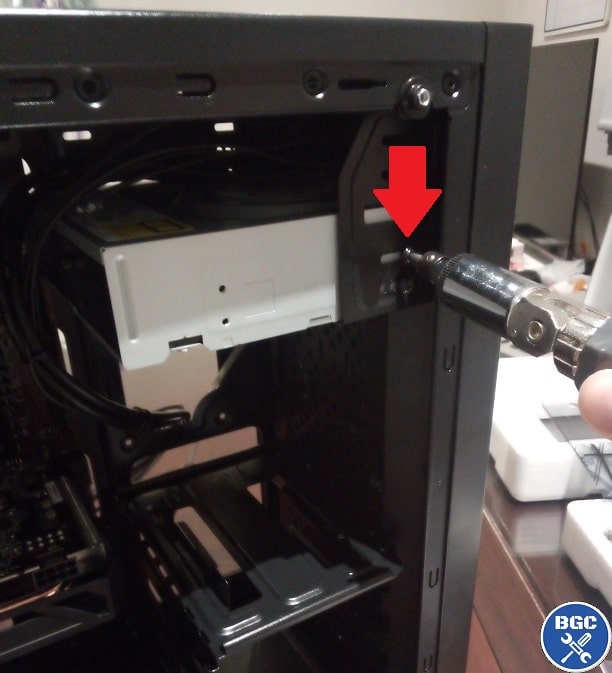 Secure optical drive in case with 2-4 "M3" screws
4. Connect Optical Drive to Motherboard (With SATA Data Cable)
Once your CD/DVD/Blu-ray drive is securely installed in your computer case, you need to connect 2 cables. The first of which is the SATA data cable which plugs into the back of the optical drive and into a SATA port on the motherboard.
If you bought an OEM (Original Equipment Manufacturer) optical drive which only came with the bare drive and nothing else, you will need to use a SATA data cable provided by your motherboard (most boards come with at least 2). Otherwise, you'll need to buy one.
In terms of which SATA port to plug the optical drive into, that's a good question. SATA ports are labelled from 0 or 1 onwards, and you want your storage drives to be plugged into the lowest numbered ports, and then have your optical drive AFTER the storage drives.
In other words, say you have an SSD, a HDD, and a optical drive. You want to plug the SSD into SATA port 0 (or 1), the HDD into SATA port 1 (or 2), and then your optical drive into any of the other SATA ports.
Also, when plugging the SATA data cable from the optical drive to the motherboard, try to thread it through a cable management hole on the back of the case somewhere if you can to keep things neat. Having loose cables hanging around in the case isn't ideal, and something to avoid if at all possible.
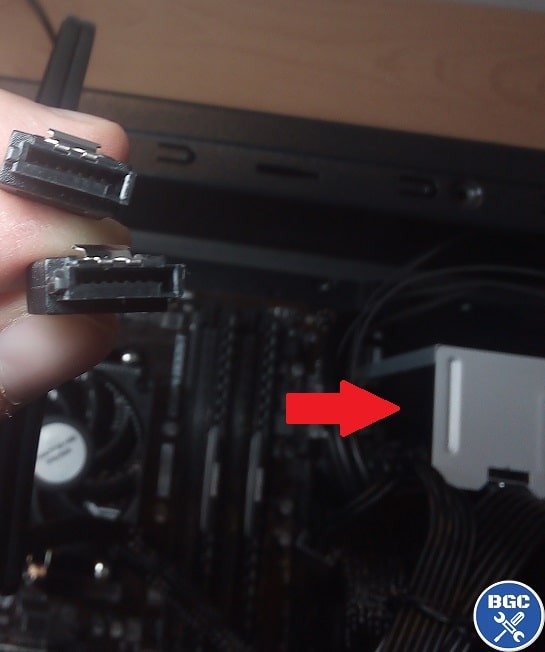 These is a SATA data cable which plugs into the back of the optical drive, as well as into a SATA port on the motherboard
Note: For anyone wondering, if you have a motherboard that has a mix of both SATA2 and SATA3 ports, most optical drives don't take advantage of SATA3 so it doesn't matter if you plug it into a SATA2 port.
5. Connect Optical Drive to Power Supply (With SATA Power Cable)
Now all that's left is to take one of the SATA power cables from the power supply and connect it into the back of the optical drive.
If you're building a new PC from scratch and haven't reached the section on installing the power supply, then you can just do this later on once you've installed the power supply in the case (but don't forget otherwise your optical drive won't work).
When you eventually load up your PC, the system will automatically recognize your optical drive and there's nothing else you need to do as optical drives don't require you to install drivers.
Some optical drives will come with a CD or DVD containing software, but installing this isn't necessary unless you want to use said software. That's all there is to installing an optical drive in your PC.
See How to Assemble a PC from Scratch for all other component installation steps (also explained in an easy to understand way, with plenty of helpful photos and diagrams)
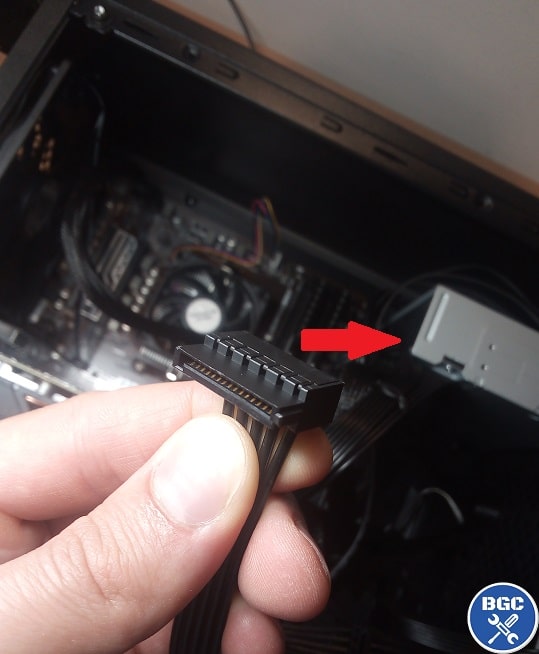 A SATA power cable (supplied by all modern power supplies) also needs to be plugged into the back of the optical drive
Trusted VPN
VPN software can be important in this day and age, especially if you do lots of online banking and/or use public WiFi whilst travelling. Having a VPN adds an extra layer of security to your PC or laptop when online to help protect your data, passwords, financials, etc from hackers or malicious programs. It can also let you access region-locked content (eg US Netflix from overseas). For gamers their can be even more benefits to using a VPN.
Because they're so popular these days, there are countless VPN providers, and it can be confusing to pick one. If you want my 2 cents, after a lot of research I decided on NordVPN 'cause it's one of the fastest, most reliable VPNs for both gaming and general use, with a lot of credible reviews out there backing that up. They also quite often run very solid deals.
Popular Articles (see all)
Search the Site
About the Author (2025 Update)
I'm an indie game developer currently very deep in development on my first public release, a highly-immersive VR spy shooter set in a realistic near-future releasing on Steam when it's ready. The game is partly inspired by some of my favorites of all time including Perfect Dark, MGS1 and 2, HL2, Splinter Cell, KOTOR, and Deus Ex (also movies like SW1-6, The Matrix, Bladerunner, and 5th Element).
Researching, writing, and periodically updating this site helps a little with self-funding the game as I earn a few dollars here and there from Amazon's affiliate program (if you click an Amazon link on this site and buy something, I get a tiny cut of the total sale, at no extra cost to you).
Hope the site helps save you money or frustration when building a PC, and if you want to support the countless hours gone into creating and fine-tuning the many guides and tutorials on the site, besides using my Amazon links if purchasing something, sharing an article on socials or Reddit does help and is much appreciated.

