Home > Assemble a PC > AMD Wraith Prism
How to Install Wraith Prism RGB LED
Installation of AMD's High-End Stock Cooler (Comes With Some AM4 & AM5 CPUs)
Published: February 19, 2023
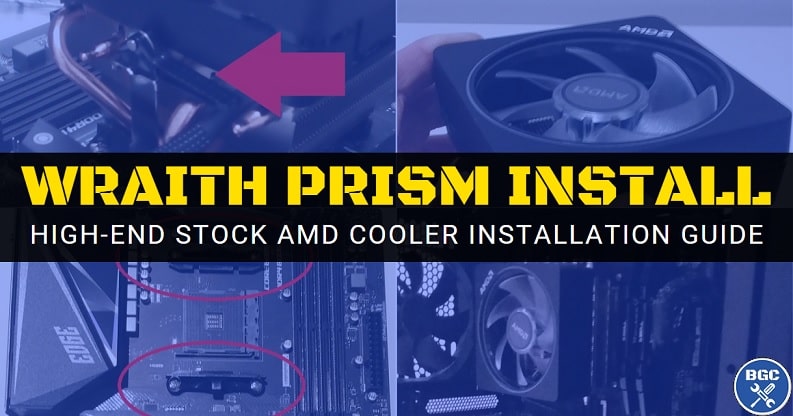
Learn how to install the Wraith Prism RGB LED cooler, which is the AMD stock cooler that comes shipped with some modern AMD processors (see the FAQ at the end of this article for a list of models that come with the Wraith Prism). Installation of a Wraith Prism is straightforward, and does not take long, but if you want all of the steps explained in more detail than what is presented in your AMD manual, and with photos, this tutorial is here to help.
Before going ahead with the Wraith Prism installation steps below, make sure you're aware of basic safety precautions when working with PC components such as grounding yourself by touching metal before handling any internal hardware (explained in our full guide to building a PC from scratch).
See Also: How to Install the Wraith Stealth
1. Ensure CPU is Installed Properly (and Top is Clean)
Before installing any CPU cooler, make sure your CPU is properly seated in the motherboard's CPU socket. Also make sure the small retention arm on the socket is down and locked into place. See how to install a CPU step by step if you need help with that.
If you're installing the Wraith Prism cooler into an existing system, and you previously removed the old CPU cooler, you want to make sure the top of the CPU is clean of any old thermal paste (or general dust and debris). Use a lint-free cloth and isopropyl alcohol if you need to wipe off any thermal paste residue from the previous cooler.
Speaking of thermal paste, there is no need to apply thermal paste yourself when it comes to installing stock AMD coolers such as the Wraith Prism as they already come with thermal paste pre-applied to the bottom.
That's assuming you bought the Wrath Prism brand new (whether by buying a CPU that came with it, or buying the cooler separately as new). If you bought a second-hand Wraith Prism that's already been used, it may not have the pre-applied paste on the bottom, in which case you will need to apply thermal paste to the top of the CPU yourself.
2. Ensure AMD Mounting Brackets Are Installed
Unlike the more basic Wraith Stealth cooler installation, which doesn't require mounting brackets for installation, the Wraith Prism needs to be mounted onto the stock AMD mounting brackets. If they are not already in place on your motherboard, they should have come in the box of your AMD motherboard, and you need to screw them into place using the 4 provided screws.
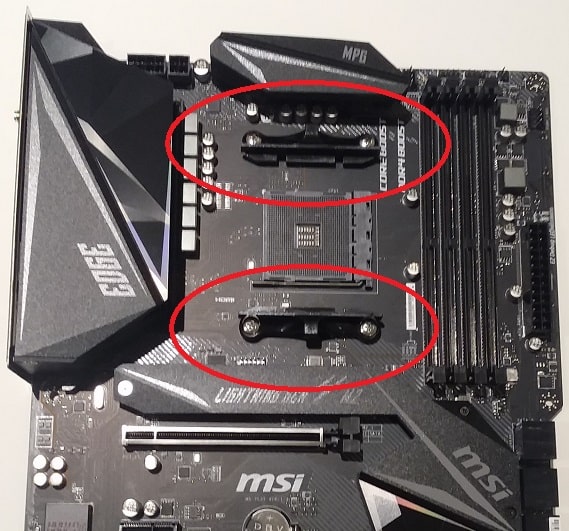 Check for the presence of these 2 AMD mounting brackets on your motherboard
If your motherboard doesn't have the mounting brackets already, you need to install them to be able to mount the Wraith Prism cooler. Firstly, place the backplate on the rear of the motherboard (underneath the board) and line it up so the 4 screws poke through on each corner of the CPU socket:
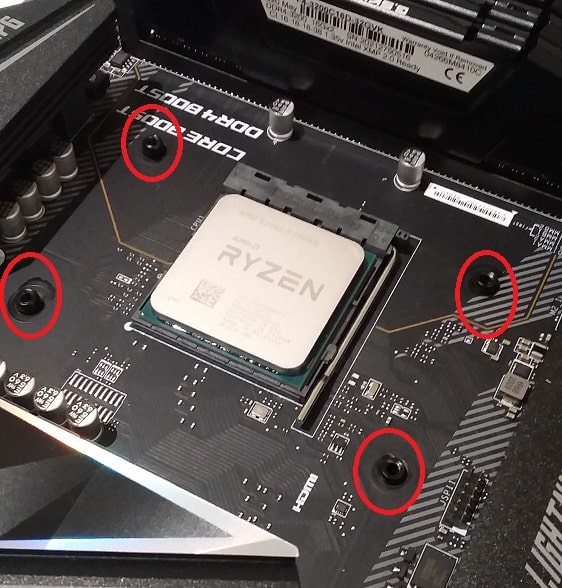 If you have to install the mounting brackets, make sure the backplate is in place first
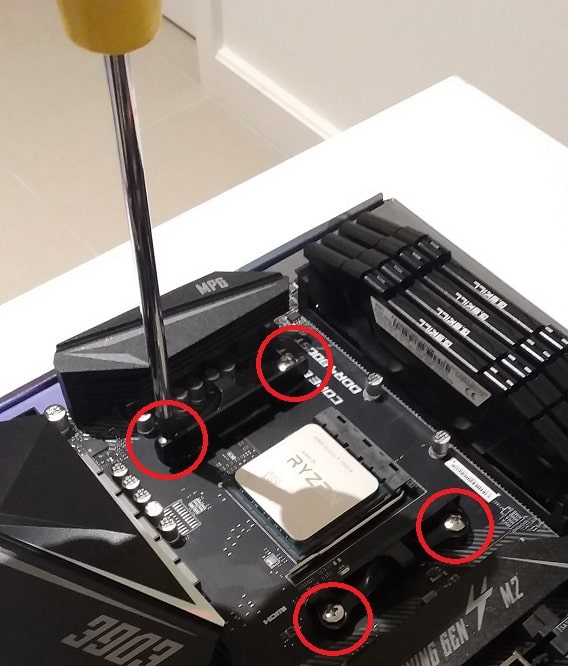
Then place the 2 mounting brackets on top, making sure they are facing the correct way as pictured, and screw them in using the 4 screws that came with the mounting brackets until they are nice and tight:
3. Mount Wraith Prism Onto Motherboard
Grab the Wraith Prism cooler, and hold it by its sides. Make sure not to touch the pre-applied thermal paste on the bottom when handling it.
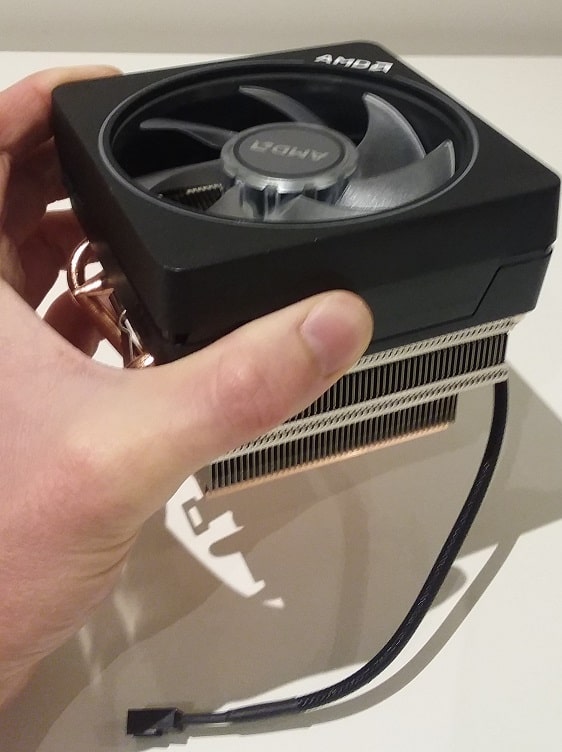
On each side of the cooler is a metal clip. On one side, the metal clip should be firm and unmoveable. On the other side, the metal clip should be loose and with a black lever on top that is needed later on to secure the cooler.
You want to place the cooler on top of the CPU, and hook the side with the firm metal clip first (the unmovable one) onto the mounting bracket on the motherboard:
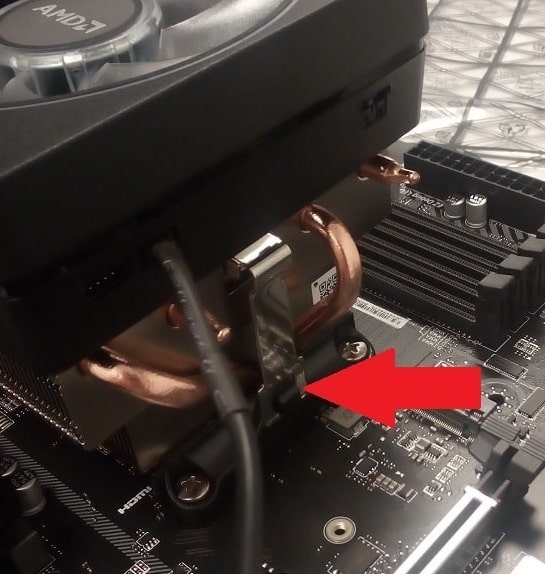 Attach the side with the firm metal clip to the clip/lung on the motherboard
Now clip the other side of the cooler (the loose side) to the motherboard mounting bracket. You may have to push the loose metal clip around a bit in order to be able to clip it onto the motherboard.
4. Lock Wraith Prism in Place
On that same loose side of the cooler (where the loose metal clip is) you will see a black lever. It should be facing to the left (when looking at that side of the cooler front-on) which means it's unlocked. You need to pull it 180 degrees over to the right in order to lock the cooler into place.
To do that you want to apply firm but even pressure to the top of the cooler (so that you're pressing it down onto the CPU in an even manner, ie from the middle) and use your other hand to pull the lever all the way over to the other side.
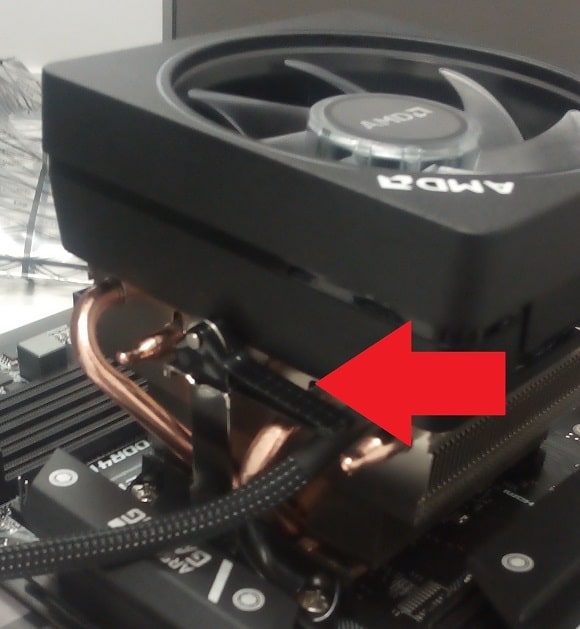 Pull the lever to lock the Wraith Prism so that it looks like this
To check the Wraith Prism is installed properly, lift the motherboard up off your work table by the top of the cooler. The cooler should feel firmly and securely attached to the motherboard.
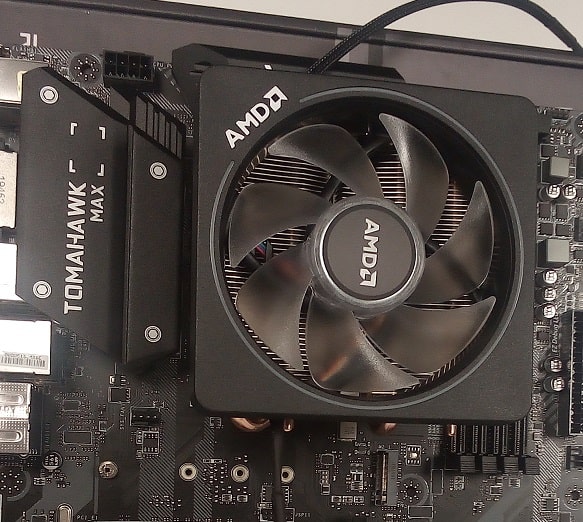 The Wraith Prism is now installed, but now you must connect the cables
5. Connect Fan and RGB/USB Cable to Motherboard
Now that the Wraith Prism has been mounted successfully, you need to connect the 2 attached cables. The first one is for power and is required for operation, and the second one is for lighting.
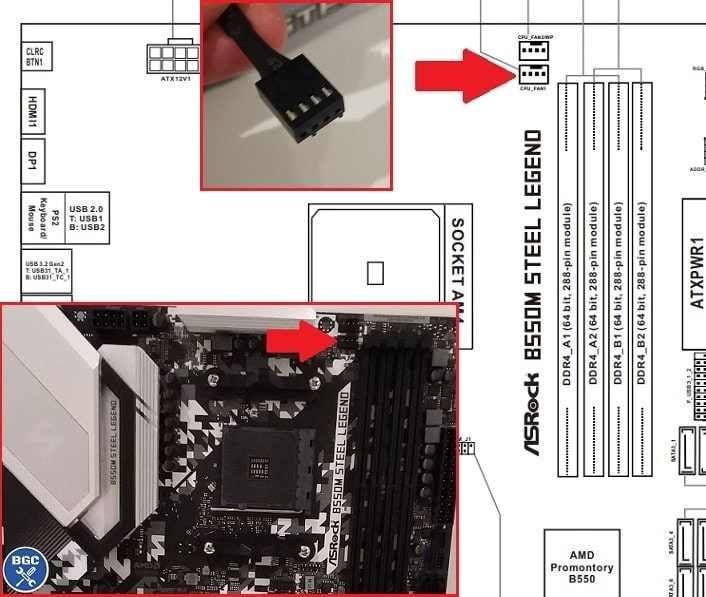
The 4 pin power cable connector plugs into the CPU fan header on the motherboard, which should be printed on the motherboard as "CPU_FAN" or something like that. This is where it plugs in on a motherboard, but keep in mind the exact location of it can vary from motherboard to motherboard:
As for the RGB/USB cable, if you look closely on one of the sides of the Wraith Prism you'll see little ports where you can plug in either the provided USB cable or the provided RGB cable (both of these cables come with the Wraith Prism). You need to first take the caps off these little ports on the cooler.
But you only need to connect one of these cables for the lighting to work on the cooler. It's not recommended to plug both in because they can work against each other. Which cable you connect though depends on how you'll be controlling the RGB lighting of the Wraith Prism, and whether or not you have an RGB header on your motherboard (not to be confused with ARGB headers which are different). Whether you use the RGB cable or the USB cable, you can have control over the lighting, but using the USB cable along with this Cooler Master software allows you the most control over the lighting.
So, if you want to plug in the USB cable (recommended for most), plug the USB cable into the side of the cooler and then into a spare USB header on your motherboard and plug it in (should be at the bottom of your motherboard somewhere, near all of the case front panel connections). Or, if your motherboard has a RGB header, and you want to use your motherboard's RGB software instead to control the lighting (accepting that you'll have a bit less control), plug the RGB cable into the cooler and into the RGB header on the motherboard.
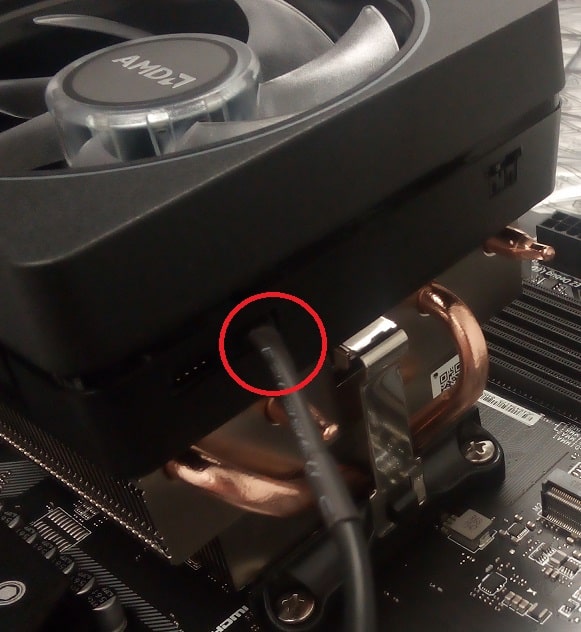 Where the USB port plugs into on the cooler (other end plugs into a USB header on the motherboard)
FAQ
What is the H/L Switch on the Wraith Prism?
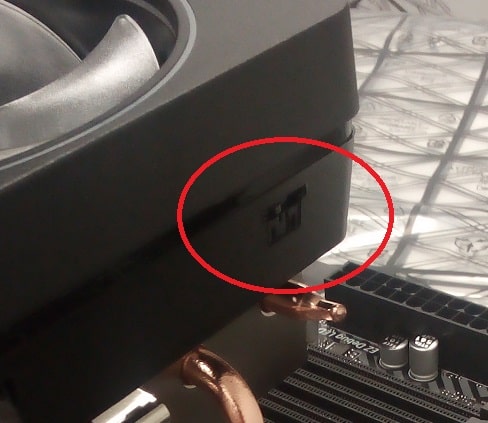
If you look on the side of the cooler where the USB and RGB cable ports are, you'll also see a small switch marked H and L which is for high speed or low speed mode. This adjusts the maximum RPM of the fan, with the high setting allowing for up to 3800 RPM and the low setting allowing up to 3000 RPM. If you want the best cooling at the expense of more noise, set it to high speed. For less noise, keep it at the default low speed setting.
How to Make the Wraith Prism More Quiet?
If your Wraith Prism cooler is running quite loud, check that you have the cooler physically set to 'L' for Low speed. Also, set a less aggressive fan curve in your motherboard BIOS or in Ryzen Master software so that the fan doesn't spin as fast, as this will reduce the noise coming from the cooler's fan.
Which CPUs Come With the Wraith Prism Cooler?
The following CPUs come included with the Wraith Prism RGB LED cooler:
- AMD Ryzen 9 7900
- AMD Ryzen 7 7700
- AMD Ryzen 9 3900X
- AMD Ryzen 7 3800X
- AMD Ryzen 7 3700X
- AMD Ryzen 7 2700X
Source: AMD
Trusted VPN
VPN software can be important in this day and age, especially if you do lots of online banking and/or use public WiFi whilst travelling. Having a VPN adds an extra layer of security to your PC or laptop when online to help protect your data, passwords, financials, etc from hackers or malicious programs. It can also let you access region-locked content (eg US Netflix from overseas). For gamers their can be even more benefits to using a VPN.
Because they're so popular these days, there are countless VPN providers, and it can be confusing to pick one. If you want my 2 cents, after a lot of research I decided on NordVPN 'cause it's one of the fastest, most reliable VPNs for both gaming and general use, with a lot of credible reviews out there backing that up. They also quite often run very solid deals.
Popular Articles (see all)
Search the Site
About the Author (2025 Update)
I'm an indie game developer currently very deep in development on my first public release, a highly-immersive VR spy shooter set in a realistic near-future releasing on Steam when it's ready. The game is partly inspired by some of my favorites of all time including Perfect Dark, MGS1 and 2, HL2, Splinter Cell, KOTOR, and Deus Ex (also movies like SW1-6, The Matrix, Bladerunner, and 5th Element).
Researching, writing, and periodically updating this site helps a little with self-funding the game as I earn a few dollars here and there from Amazon's affiliate program (if you click an Amazon link on this site and buy something, I get a tiny cut of the total sale, at no extra cost to you).
Hope the site helps save you money or frustration when building a PC, and if you want to support the countless hours gone into creating and fine-tuning the many guides and tutorials on the site, besides using my Amazon links if purchasing something, sharing an article on socials or Reddit does help and is much appreciated.

